How to Install SEOquake: A Comprehensive Guide for SEO Professionals
In the ever-evolving landscape of Search Engine Optimization (SEO), having the right tools at your disposal is crucial. Among the myriad of SEO extensions and toolbars available, SEOquake stands out as a versatile and powerful asset for SEO professionals. This guide provides a comprehensive, step-by-step walkthrough on how to install SEOquake, ensuring you can leverage its capabilities to enhance your SEO efforts. From understanding its core features to troubleshooting common installation issues, we’ll cover everything you need to get started with SEOquake.
Understanding SEOquake and Its Benefits
SEOquake is a free SEO toolbar developed by SEMrush that provides key SEO metrics directly within your browser. It supports multiple browsers including Chrome, Firefox, and Opera. Once installed, SEOquake displays a wealth of information about websites and search engine results pages (SERPs), allowing for quick analysis and informed decision-making. Its key benefits include:
- SERP Overlay: Displays metrics like Google PageRank, Alexa Rank, and SEMrush Rank directly on search results.
- Website Audit: Provides a detailed audit of any webpage, highlighting potential SEO issues.
- Keyword Analysis: Helps analyze keyword density and usage on a page.
- Exporting Data: Allows exporting SERP data and website audit reports for further analysis.
- Customizable Interface: Offers a highly customizable interface to display only the metrics you need.
Before we delve into the installation process, it’s important to ensure your browser is compatible and up-to-date to avoid any potential issues.
Step-by-Step Guide to Installing SEOquake
Installing SEOquake on Google Chrome
Google Chrome is one of the most popular browsers used by SEO professionals. Here’s how to install SEOquake on Chrome:
- Open Google Chrome: Launch your Google Chrome browser.
- Navigate to the Chrome Web Store: Go to the Chrome Web Store by typing “Chrome Web Store” in the search bar or directly navigating to chrome.google.com/webstore/category/extensions.
- Search for SEOquake: In the search bar at the top left corner of the Chrome Web Store, type “SEOquake“.
- Select SEOquake: From the search results, find the SEOquake extension developed by SEMrush and click on it.
- Add to Chrome: Click the “Add to Chrome” button located on the right side of the extension page.
- Confirm Installation: A pop-up window will appear asking for permissions. Click “Add extension” to confirm the installation.
- Installation Complete: Once installed, you’ll see a confirmation message indicating that SEOquake has been added to Chrome. You may also see the SEOquake icon appear in your browser toolbar.
Installing SEOquake on Mozilla Firefox
For Firefox users, the installation process is equally straightforward:
- Open Mozilla Firefox: Launch your Mozilla Firefox browser.
- Navigate to Firefox Add-ons: Go to the Firefox Add-ons website by typing “Firefox Add-ons” in the search bar or directly navigating to addons.mozilla.org.
- Search for SEOquake: In the search bar at the top right corner of the Firefox Add-ons page, type “SEOquake“.
- Select SEOquake: From the search results, find the SEOquake add-on developed by SEMrush and click on it.
- Add to Firefox: Click the “Add to Firefox” button located on the extension page.
- Confirm Installation: A pop-up window will appear asking for permissions. Click “Add” to confirm the installation.
- Installation Complete: Once installed, you’ll see a confirmation message indicating that SEOquake has been added to Firefox. The SEOquake icon should appear in your browser toolbar.
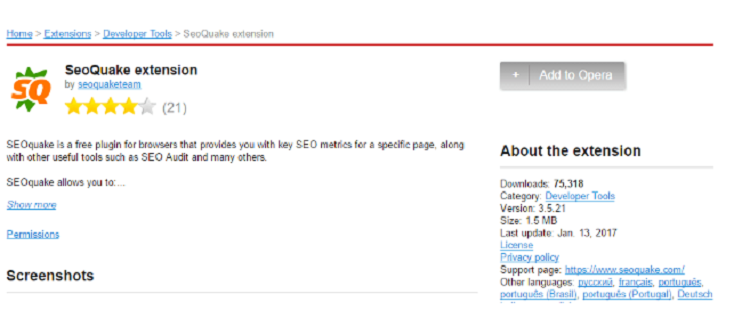
Installing SEOquake on Opera
Opera users can also benefit from SEOquake. The installation process is similar to Chrome:
- Open Opera: Launch your Opera browser.
- Navigate to Opera Add-ons: Go to the Opera Add-ons website by typing “Opera Add-ons” in the search bar or directly navigating to addons.opera.com.
- Search for SEOquake: In the search bar at the top right corner of the Opera Add-ons page, type “SEOquake“.
- Select SEOquake: From the search results, find the SEOquake extension developed by SEMrush and click on it.
- Add to Opera: Click the “Add to Opera” button located on the extension page.
- Confirm Installation: A pop-up window will appear asking for permissions. Click “Install” to confirm the installation.
- Installation Complete: Once installed, you’ll see a confirmation message indicating that SEOquake has been added to Opera. The SEOquake icon should appear in your browser toolbar.
Configuring SEOquake After Installation
Once you’ve installed SEOquake, it’s essential to configure it to suit your specific needs. Here’s how:
Activating the SEOquake Toolbar
After installation, the SEOquake toolbar might not be immediately visible. To activate it:
- Locate the SEOquake Icon: Find the SEOquake icon in your browser toolbar.
- Click on the Icon: Click the icon to open the SEOquake menu.
- Enable the Toolbar: In the menu, find the option to enable the toolbar and click it. The toolbar should now appear below the address bar.
Customizing the SEOquake Metrics
SEOquake allows you to customize the metrics displayed in the toolbar and SERP overlay. To customize:
- Open SEOquake Settings: Click on the SEOquake icon and select “Settings”.
- Choose Parameters: In the settings menu, you can choose which parameters to display. Select the metrics that are most relevant to your SEO analysis.
- Save Changes: After selecting your desired parameters, save the changes. The toolbar and SERP overlay will now display the metrics you’ve chosen.
Setting Default Parameters
You can also set default parameters for different types of pages (e.g., SERP, external pages, internal pages). This ensures that SEOquake displays the most relevant metrics for each type of page.
Troubleshooting Common Installation Issues
While the installation process is generally straightforward, some users may encounter issues. Here are some common problems and their solutions:
- SEOquake Not Appearing: If SEOquake doesn’t appear after installation, ensure that the extension is enabled in your browser’s extension settings. Go to your browser’s extension management page and check if SEOquake is enabled.
- Conflicting Extensions: Sometimes, other browser extensions can conflict with SEOquake. Try disabling other extensions to see if this resolves the issue.
- Outdated Browser: Ensure that your browser is up-to-date. Older browser versions may not be compatible with the latest version of SEOquake.
- Corrupted Installation: If none of the above solutions work, try uninstalling SEOquake and reinstalling it. This can resolve issues caused by a corrupted installation.
Leveraging SEOquake for Effective SEO Analysis
Now that you’ve installed SEOquake and configured it, you can start leveraging its capabilities for effective SEO analysis. Here are some ways to use SEOquake:
Analyzing SERPs
SEOquake provides a wealth of information directly on the SERPs. You can use this information to:
- Assess Competitor Strength: Quickly assess the strength of your competitors based on metrics like Google PageRank, Alexa Rank, and SEMrush Rank.
- Identify Ranking Factors: Analyze the top-ranking pages to identify potential ranking factors.
- Evaluate Keyword Performance: Evaluate the performance of your target keywords by analyzing the SERP results.
Auditing Websites
SEOquake‘s website audit feature allows you to identify potential SEO issues on any webpage. You can use this feature to:
- Identify Technical SEO Issues: Identify technical SEO issues like broken links, duplicate content, and missing meta descriptions.
- Analyze On-Page Optimization: Analyze on-page optimization factors like keyword density, heading structure, and image optimization.
- Improve Website Performance: Use the audit results to improve your website’s performance in search engines.
Keyword Analysis
SEOquake can help you analyze keyword usage on a page. You can use this feature to:
- Check Keyword Density: Check the density of your target keywords on a page.
- Identify Keyword Stuffing: Identify instances of keyword stuffing, which can negatively impact your SEO.
- Optimize Keyword Usage: Optimize your keyword usage to improve your website’s ranking for your target keywords.
Conclusion
Installing SEOquake is a simple yet powerful way to enhance your SEO capabilities. By following this comprehensive guide, you can quickly install SEOquake on your preferred browser and start leveraging its features for effective SEO analysis. Whether you’re analyzing SERPs, auditing websites, or conducting keyword research, SEOquake provides valuable insights that can help you improve your website’s performance in search engines. Make sure to keep your SEOquake extension updated to benefit from the latest features and improvements. [See also: SEOquake vs. Other SEO Tools] [See also: Advanced SEO Techniques] [See also: Common SEO Mistakes]
