How to Fix a Burned Nonstick Pot: A Comprehensive Guide
Discovering a burned nonstick pot can be frustrating. The smell, the mess, and the potential damage to your cookware can leave you wondering if it’s salvageable. Fortunately, in many cases, you can restore your pot to its former glory with the right techniques and a little patience. This comprehensive guide will walk you through various methods on how to fix a burned nonstick pot, from gentle cleaning to more intensive treatments. We’ll also cover preventative measures to keep your pots in pristine condition and discuss when it’s time to say goodbye to a damaged pot.
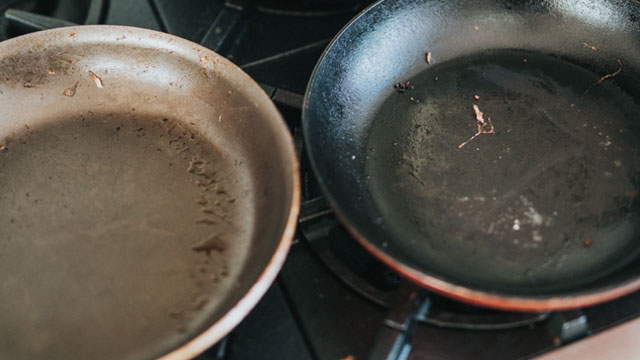
Understanding the Damage
Before attempting any cleaning method, it’s crucial to understand the extent of the damage. Is it a superficial burn with food residue stuck to the surface, or is the nonstick coating itself damaged? Minor burns usually involve food particles that have charred onto the surface. More severe burns can damage the nonstick coating, leading to peeling, blistering, or even the release of harmful chemicals. Identifying the severity of the burn will help you choose the most appropriate cleaning method. Remember, safety is paramount; if you suspect the coating is significantly damaged, discontinue use.
Gentle Cleaning Methods for Minor Burns
The Soaking Method
The simplest and often most effective method for how to fix a burned nonstick pot is soaking. Fill the pot with warm water and add a few drops of dish soap. Let it soak for at least 30 minutes, or even overnight for stubborn burns. The warm water helps to loosen the burnt food particles, making them easier to scrub away. After soaking, use a soft sponge or cloth to gently scrub the pot. Avoid using abrasive scrubbers or steel wool, as these can scratch and damage the nonstick coating.
Baking Soda Paste
Baking soda is a gentle abrasive that can help remove stubborn burnt food without damaging the nonstick surface. To make a baking soda paste, mix baking soda with a small amount of water until you form a thick paste. Apply the paste to the burned areas of the pot and let it sit for 15-20 minutes. Then, gently scrub the paste with a soft sponge or cloth. Rinse thoroughly with warm water. This method is particularly effective for removing slightly burned food residue. If you are wondering how to fix a burned nonstick pot, baking soda is a great start.
Boiling Water and Baking Soda
For more stubborn burns, try boiling water with baking soda. Fill the pot with water and add 2 tablespoons of baking soda. Bring the mixture to a boil and let it simmer for 10-15 minutes. The boiling water and baking soda will help to loosen the burnt food particles. After simmering, let the pot cool slightly and then scrub gently with a soft sponge or cloth. Rinse thoroughly with warm water. This method is quite effective and helps to remove even tough burn marks. This is another way how to fix a burned nonstick pot.
More Intensive Cleaning Methods for Stubborn Burns
Vinegar and Baking Soda
For particularly stubborn burns, a combination of vinegar and baking soda can be effective. First, fill the pot with water and add 1/2 cup of white vinegar. Bring the mixture to a boil and let it simmer for 10 minutes. Remove the pot from the heat and add 2 tablespoons of baking soda. The mixture will fizz, so be careful. Let it sit for 30 minutes, then scrub gently with a soft sponge or cloth. Rinse thoroughly with warm water. This method is a stronger approach and can help to break down even the most stubborn burnt food particles. Many people ask how to fix a burned nonstick pot and this is a proven method.
Dishwasher Detergent and Dryer Sheet
This unconventional method can sometimes work wonders. Place a dryer sheet in the burned pot, add a squirt of dish soap, and fill with water. Let it sit overnight. The chemicals in the dryer sheet, combined with the dish soap, help to loosen the burnt food particles. In the morning, the burnt residue should be easier to scrub away with a soft sponge. This method is worth trying if other methods have failed. If you are wondering how to fix a burned nonstick pot, you might be surprised by the effectiveness of this method.
Preventative Measures to Avoid Burns
Prevention is always better than cure. To avoid burning your nonstick pots in the first place, follow these preventative measures:
- Use Medium Heat: High heat can damage the nonstick coating and cause food to burn more easily.
- Use Oil or Butter: Always use a little oil or butter when cooking with nonstick pots to prevent food from sticking and burning.
- Stir Frequently: Stirring food frequently prevents it from sticking to the bottom of the pot and burning.
- Don’t Leave Unattended: Never leave a pot unattended while cooking, especially when using high heat.
- Proper Storage: Store your nonstick pots carefully to avoid scratching the coating. Use pot protectors or hang them on a rack.
When to Replace Your Nonstick Pot
While many burns can be fixed, there comes a time when a nonstick pot is beyond repair. If the nonstick coating is significantly damaged, peeling, or blistering, it’s time to replace the pot. Damaged nonstick coatings can release harmful chemicals into your food. Additionally, a severely damaged pot will no longer function effectively, causing food to stick and burn easily. Investing in a new, high-quality nonstick pot will ensure safer and more enjoyable cooking experiences. Knowing how to fix a burned nonstick pot is helpful, but sometimes replacement is necessary.
Safety Considerations
When cleaning a burned nonstick pot, always prioritize safety. Wear gloves to protect your hands from harsh chemicals and hot water. Ensure proper ventilation when using cleaning solutions. Avoid using abrasive scrubbers or steel wool, as these can damage the nonstick coating and release harmful particles. If you suspect the nonstick coating is severely damaged, discontinue use and dispose of the pot properly. Also, be mindful of the fumes produced during the burning process, and ensure the area is well-ventilated. It is important to consider safety when thinking about how to fix a burned nonstick pot.
Choosing the Right Nonstick Pot
Investing in a high-quality nonstick pot can make a significant difference in your cooking experience. Look for pots that are made from durable materials and have a thick, even nonstick coating. Consider pots that are PFOA-free, as PFOA is a chemical that was previously used in the manufacturing of nonstick coatings and has been linked to health concerns. Read reviews and compare different brands to find a pot that meets your needs and budget. A good nonstick pot should last for several years with proper care. You can prevent needing to know how to fix a burned nonstick pot by buying a quality pot.
Alternative Uses for Damaged Nonstick Pots
If your nonstick pot is beyond repair for cooking purposes, consider repurposing it for other uses. Damaged pots can be used as planters for herbs or flowers. They can also be used to store craft supplies or other household items. Get creative and find new ways to give your old pot a new life. This reduces waste and gives you a functional item. Even if you know how to fix a burned nonstick pot, sometimes repurposing is the best option.
Conclusion
Dealing with a burned nonstick pot can be frustrating, but with the right techniques, you can often restore it to its former glory. Remember to start with gentle cleaning methods and gradually move to more intensive treatments if necessary. Always prioritize safety and take preventative measures to avoid burns in the future. And, if the damage is too severe, don’t hesitate to replace the pot. By following these tips, you can keep your nonstick cookware in pristine condition and enjoy years of hassle-free cooking. Knowing how to fix a burned nonstick pot is a valuable skill for any home cook. So, next time you face this kitchen mishap, you’ll be well-equipped to tackle it head-on. These methods will make your nonstick cookware last longer and save you money in the long run.
