Delta Faucets Leaking Kitchen: Troubleshooting and Solutions
A leaky faucet is more than just an annoyance; it’s a drain on your water bill and a potential sign of a more significant plumbing issue. When it comes to Delta faucets leaking kitchen, understanding the common causes and knowing how to address them can save you time, money, and frustration. This article provides a comprehensive guide to troubleshooting and fixing Delta faucets leaking kitchen, ensuring a drip-free experience. We’ll cover common issues, necessary tools, step-by-step repair instructions, and preventative measures.
Understanding Why Your Delta Faucet is Leaking
Several factors can contribute to Delta faucets leaking kitchen. Identifying the root cause is the first step in resolving the problem effectively. Here are some of the most frequent culprits:
- Worn-Out O-Rings and Washers: These small rubber or plastic components create a watertight seal within the faucet. Over time, they can degrade, crack, or become brittle, leading to leaks.
- Loose or Damaged Cartridge: Many Delta faucets utilize a cartridge system to control water flow and temperature. A loose or damaged cartridge can cause drips and leaks, especially around the handle.
- Corroded Valve Seats: Valve seats are the stationary parts against which the washers press to shut off the water flow. Corrosion or mineral buildup on the valve seats can prevent a tight seal, resulting in leaks.
- High Water Pressure: Excessive water pressure can put stress on the faucet’s internal components, accelerating wear and tear and increasing the likelihood of leaks.
- Improper Installation: Even a high-quality faucet can leak if it wasn’t installed correctly in the first place. Misaligned parts or loose connections can lead to immediate or eventual leakage.
Essential Tools for Fixing a Leaky Delta Faucet
Before you begin any repairs, gather the necessary tools. Having the right equipment on hand will make the job easier and more efficient. Here’s a list of essential tools:
- Adjustable Wrench: For loosening and tightening nuts and connections.
- Screwdrivers (Phillips and Flathead): For removing screws and disassembling faucet parts.
- Pliers: For gripping and manipulating small parts.
- Allen Wrench Set: For removing set screws that hold handles in place.
- Basin Wrench: For reaching hard-to-access nuts under the sink.
- Penetrating Oil: To loosen stubborn or corroded parts.
- Replacement Parts: O-rings, washers, cartridges, and valve seats that match your specific Delta faucet model.
- Clean Cloths or Sponges: For cleaning and wiping up spills.
- Plumber’s Grease: To lubricate parts during reassembly.
Step-by-Step Guide to Repairing a Leaky Delta Kitchen Faucet
Follow these steps to troubleshoot and repair your Delta faucets leaking kitchen. Always remember to shut off the water supply before starting any repairs.
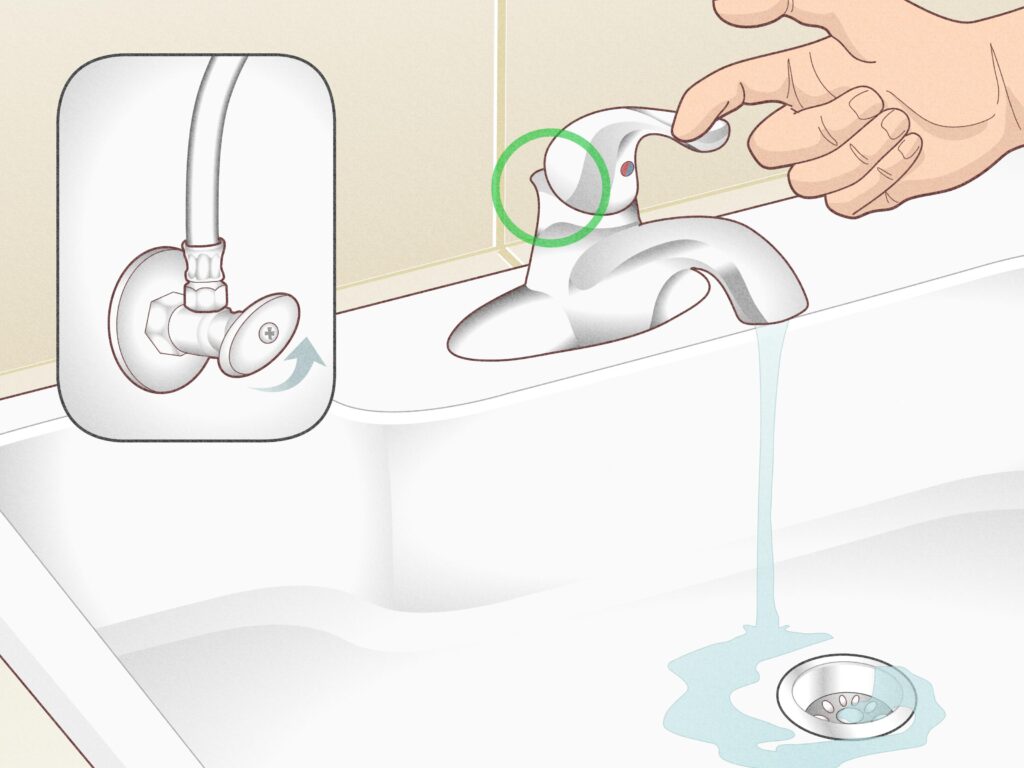
Step 1: Shut Off the Water Supply
Locate the shut-off valves under the kitchen sink. Turn both the hot and cold water valves clockwise until they are completely closed. If you don’t have individual shut-off valves, you may need to shut off the main water supply to your house.
Step 2: Disassemble the Faucet
Start by removing the handle. Depending on your Delta faucet model, this may involve loosening a set screw with an Allen wrench or unscrewing a decorative cap to access a screw. Once the handle is removed, you can access the faucet’s internal components.
Step 3: Identify and Replace Worn-Out Parts
Carefully examine the O-rings, washers, and cartridge. Look for signs of wear, such as cracks, tears, or deformation. Replace any damaged parts with new ones that are specifically designed for your Delta faucet model. It’s often a good idea to replace all the O-rings and washers at the same time, even if only one appears to be damaged. This can prevent future leaks.
Step 4: Clean the Valve Seats
If the valve seats are corroded or have mineral buildup, clean them thoroughly with a small brush or a specialized valve seat wrench. You can also use a mild abrasive cleaner to remove stubborn deposits. Ensure the valve seats are smooth and free of any imperfections before reassembling the faucet.
Step 5: Reassemble the Faucet
Carefully reassemble the faucet in the reverse order of disassembly. Apply a small amount of plumber’s grease to the O-rings and washers to ensure a smooth and watertight seal. Tighten all connections securely, but avoid over-tightening, which can damage the parts.
Step 6: Test for Leaks
Turn the water supply back on slowly and check for leaks around the faucet base, handle, and spout. If you still notice leaks, double-check the connections and make sure all parts are properly seated. You may need to disassemble the faucet again and re-examine the components.
Common Delta Faucet Problems and Solutions
Here’s a rundown of specific Delta faucet issues and how to resolve them:
- Leaking at the Base of the Spout: This is often caused by worn-out O-rings. Replace the O-rings on the spout to stop the leak.
- Leaking Around the Handle: This is usually due to a loose or damaged cartridge. Tighten the cartridge nut or replace the cartridge if necessary.
- Dripping from the Spout: This can be caused by a worn-out washer or corroded valve seat. Replace the washer and clean the valve seat to resolve the issue.
- Low Water Pressure: This may be due to a clogged aerator. Remove the aerator and clean it to improve water flow.
Preventative Measures to Avoid Future Leaks
Taking proactive steps can help prevent Delta faucets leaking kitchen in the future:
- Regular Maintenance: Periodically inspect your faucet for signs of wear and tear. Replace worn-out parts before they cause leaks.
- Control Water Pressure: Install a pressure regulator to maintain a consistent and safe water pressure level.
- Proper Installation: Ensure that your faucet is installed correctly by a qualified plumber.
- Use Quality Parts: When replacing parts, choose genuine Delta replacement parts for optimal performance and longevity.
- Avoid Harsh Chemicals: Use gentle cleaning products to avoid damaging the faucet’s finish and internal components.
When to Call a Professional Plumber
While many Delta faucet repairs can be done DIY, some situations require the expertise of a professional plumber:
- Extensive Corrosion: If the faucet is heavily corroded, it may be difficult to disassemble and repair.
- Damaged Plumbing: If you encounter damaged pipes or connections while working on the faucet, it’s best to call a plumber.
- Lack of Experience: If you’re not comfortable working with plumbing, it’s always safer to hire a professional.
Addressing Delta faucets leaking kitchen promptly can save you money on your water bill and prevent further damage to your kitchen. By understanding the common causes, having the right tools, and following these step-by-step instructions, you can often resolve the problem yourself. However, don’t hesitate to call a professional plumber if you’re unsure or encounter any complications. Regular maintenance and preventative measures can also help keep your Delta faucet in good working condition for years to come. Remember that consistent dripping from Delta faucets leaking kitchen can lead to significant water waste over time, so addressing the issue quickly is always the best approach.
By using these tips, you can effectively tackle issues related to Delta faucets leaking kitchen. Good luck!
[See also: How to Replace a Kitchen Faucet]
[See also: Common Plumbing Problems and Solutions]
[See also: Choosing the Right Kitchen Faucet]
