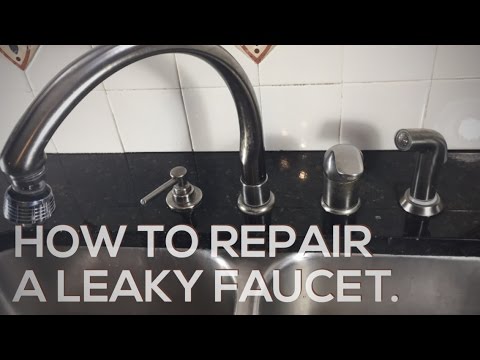
How to Fix a Delta Kitchen Faucet: A Comprehensive Guide
A dripping or malfunctioning kitchen faucet can be incredibly frustrating, leading to wasted water and higher utility bills. Among the most common brands found in homes across North America is Delta. Known for their durability and stylish designs, Delta kitchen faucets are generally reliable, but like any plumbing fixture, they can experience problems over time. This comprehensive guide will walk you through common issues and provide step-by-step instructions on how to fix a Delta kitchen faucet, saving you time and money on potential plumber visits. Understanding the components of your faucet and having the right tools on hand are essential for a successful repair.
Understanding Common Delta Kitchen Faucet Problems
Before you start dismantling your faucet, it’s crucial to diagnose the problem accurately. Here are some common issues you might encounter with your Delta kitchen faucet:
- Dripping Faucet: This is perhaps the most frequent complaint. It’s often caused by worn-out O-rings, valve seats, or cartridges.
- Low Water Pressure: Mineral buildup or a clogged aerator can restrict water flow.
- Leaking at the Base: Damaged O-rings or loose connections are usually the culprits.
- Stiff Handle: Mineral deposits or a worn cartridge can make the handle difficult to move.
- Sprayer Problems: Reduced water pressure or a faulty diverter valve can affect the sprayer’s performance.
Essential Tools and Materials
Having the right tools will make the repair process smoother and prevent further damage to your Delta kitchen faucet. Here’s a list of essential items:
- Adjustable Wrench: For loosening and tightening nuts and connections.
- Screwdrivers: Both flathead and Phillips head screwdrivers will be necessary.
- Allen Wrench Set: Delta faucets often use Allen screws.
- Pliers: For gripping and manipulating small parts.
- Basin Wrench: Helpful for reaching tight spaces under the sink.
- O-Ring Kit: A variety of O-rings to replace worn-out seals.
- Replacement Cartridge: If the cartridge is the issue, have a new one on hand. Make sure it’s compatible with your specific Delta faucet model.
- White Vinegar: For soaking and cleaning mineral deposits.
- Clean Cloths or Sponges: For wiping up spills and cleaning parts.
- Plumber’s Grease: To lubricate parts during reassembly.
Step-by-Step Guide to Fixing a Dripping Delta Kitchen Faucet
Let’s tackle the most common problem: a dripping Delta kitchen faucet. Follow these steps carefully:
Step 1: Turn Off the Water Supply
Before you begin any plumbing work, it’s crucial to shut off the water supply to the faucet. Locate the shut-off valves under the sink. Turn them clockwise until they are completely closed. If you don’t have individual shut-off valves, you’ll need to turn off the main water supply to your house. [See also: How to Locate Your Main Water Shut-Off Valve]
Step 2: Protect Your Sink
Cover the sink drain with a cloth or stopper to prevent small parts from falling into the drain. This will also protect the sink’s surface from scratches.
Step 3: Disassemble the Faucet Handle
The disassembly process varies slightly depending on the type of Delta kitchen faucet you have. However, the general steps are as follows:
- Locate the set screw on the handle. It’s usually hidden under a decorative cap.
- Use a small flathead screwdriver or Allen wrench to remove the set screw.
- Carefully pull the handle off the faucet body.
Step 4: Remove the Cartridge
Once the handle is removed, you’ll see the cartridge. Here’s how to remove it:
- Remove the retaining clip or nut that holds the cartridge in place. This may require pliers or an adjustable wrench.
- Gently pull the cartridge straight up and out of the faucet body. Be careful not to damage the cartridge or the faucet body.
Step 5: Inspect and Replace the Cartridge
Examine the cartridge for cracks, wear, or mineral buildup. If the cartridge is damaged, replace it with a new one that is compatible with your Delta kitchen faucet model. Even if the cartridge looks okay, it’s often a good idea to replace it anyway, as it’s a common cause of dripping.
Step 6: Clean the Faucet Body
Use a cloth or sponge to clean the inside of the faucet body. Remove any mineral deposits or debris. You can use white vinegar to soak stubborn deposits.
Step 7: Reassemble the Faucet
Now, put everything back together in the reverse order:
- Lubricate the new cartridge with plumber’s grease.
- Insert the cartridge into the faucet body.
- Secure the cartridge with the retaining clip or nut.
- Reattach the handle and tighten the set screw.
Step 8: Turn on the Water Supply
Slowly turn on the water supply and check for leaks. If the faucet is still dripping, double-check that the cartridge is properly installed and that all connections are tight. [See also: Troubleshooting Common Faucet Leaks]
Fixing Low Water Pressure in a Delta Kitchen Faucet
If you’re experiencing low water pressure, the problem is often a clogged aerator. Here’s how to clean it:
- Unscrew the aerator from the faucet spout.
- Disassemble the aerator components.
- Soak the components in white vinegar to dissolve mineral deposits.
- Use a small brush or toothpick to remove any remaining debris.
- Rinse the components thoroughly with water.
- Reassemble the aerator and screw it back onto the faucet spout.
If cleaning the aerator doesn’t solve the problem, the issue might be with the water supply lines or the faucet cartridge. Check the supply lines for kinks or obstructions. If the lines are clear, you may need to replace the cartridge.
Addressing Leaks at the Base of a Delta Kitchen Faucet
Leaks at the base of the faucet are often caused by worn-out O-rings or loose connections. Here’s how to address this issue:
- Turn off the water supply to the faucet.
- Loosen the nuts that secure the faucet to the sink.
- Carefully lift the faucet up and out of the sink.
- Inspect the O-rings at the base of the faucet. Replace any worn or damaged O-rings.
- Clean the sink surface and the base of the faucet.
- Reinstall the faucet and tighten the nuts.
- Turn on the water supply and check for leaks.
Dealing with a Stiff Delta Kitchen Faucet Handle
A stiff handle can be frustrating to use. It’s often caused by mineral deposits or a worn cartridge. Here’s how to fix it:
- Turn off the water supply to the faucet.
- Disassemble the faucet handle as described in the dripping faucet section.
- Remove the cartridge and inspect it for mineral buildup or damage.
- Clean the cartridge and the faucet body with white vinegar.
- Lubricate the cartridge with plumber’s grease.
- Reassemble the faucet.
If cleaning and lubricating the cartridge doesn’t solve the problem, you may need to replace the cartridge.
Troubleshooting Delta Kitchen Faucet Sprayer Problems
If your Delta kitchen faucet sprayer isn’t working properly, the problem could be a clogged sprayer head or a faulty diverter valve. Here’s how to troubleshoot the issue:
- Unscrew the sprayer head from the hose.
- Soak the sprayer head in white vinegar to dissolve mineral deposits.
- Use a small brush or toothpick to remove any remaining debris.
- Rinse the sprayer head thoroughly with water.
- Reattach the sprayer head to the hose.
If cleaning the sprayer head doesn’t solve the problem, the diverter valve might be faulty. The diverter valve is located where the sprayer hose connects to the faucet body. You may need to replace the diverter valve to restore proper sprayer function.
Preventive Maintenance for Your Delta Kitchen Faucet
Regular maintenance can help prevent problems and extend the life of your Delta kitchen faucet. Here are some tips:
- Clean the faucet regularly with a mild soap and water solution.
- Avoid using abrasive cleaners, as they can damage the finish.
- Periodically check for leaks and address them promptly.
- Lubricate the faucet handle and cartridge with plumber’s grease.
- Replace worn O-rings and cartridges as needed.
When to Call a Professional Plumber
While many Delta kitchen faucet problems can be fixed with DIY methods, there are times when it’s best to call a professional plumber. If you’re not comfortable working with plumbing, or if you’ve tried the above steps and the problem persists, it’s time to seek professional help. A plumber can diagnose the problem accurately and perform the necessary repairs safely and efficiently.
Fixing a Delta kitchen faucet doesn’t have to be a daunting task. By understanding the common problems, having the right tools, and following these step-by-step instructions, you can often resolve the issue yourself and save money on plumber fees. Remember to always turn off the water supply before starting any repairs and to consult a professional if you’re unsure about any aspect of the process. With a little patience and effort, you can keep your Delta kitchen faucet functioning smoothly for years to come. Regularly cleaning your Delta kitchen faucet and checking for any signs of wear and tear will also help prevent future issues. By following these tips, you can ensure that your Delta kitchen faucet remains in excellent condition. Remember to always use genuine Delta kitchen faucet replacement parts to ensure compatibility and longevity. When in doubt, consulting the Delta kitchen faucet manufacturer’s website or contacting their customer support can provide valuable assistance. Knowing how to properly maintain your Delta kitchen faucet can save you time and money in the long run. Whether it’s a simple drip or a more complex issue, understanding the components of your Delta kitchen faucet is key to successful repairs. Even a small drip from your Delta kitchen faucet can waste a significant amount of water over time, making timely repairs essential. Taking proactive steps to maintain your Delta kitchen faucet can prevent costly repairs down the line. Learning how to fix a Delta kitchen faucet empowers you to take control of your home maintenance and save on professional plumbing costs. With the right tools and knowledge, you can confidently address common issues with your Delta kitchen faucet and keep it functioning optimally.
