How to Fix a Leaking Sink Kitchen: A Comprehensive Guide
A leaking sink in the kitchen is more than just an annoyance; it can lead to water damage, mold growth, and increased water bills. Addressing the problem promptly and effectively is crucial. This comprehensive guide will walk you through the steps to identify the source of the leak and provide practical solutions to fix a leaking sink kitchen. Whether you’re a seasoned DIY enthusiast or a novice homeowner, this guide will equip you with the knowledge and confidence to tackle this common household issue.
Understanding the Common Causes of a Leaking Sink Kitchen
Before diving into the repair process, it’s essential to understand the potential culprits behind a leaking sink kitchen. Identifying the source of the leak is the first step towards a successful fix. Here are some of the most common causes:
- Loose or Damaged Faucet Connections: The connections between the faucet and the water supply lines are a frequent source of leaks. Over time, these connections can loosen or the O-rings and washers can deteriorate, leading to drips.
- Worn-Out Washers and O-Rings: Washers and O-rings are small rubber components that create a watertight seal in faucets and drain assemblies. These parts can become brittle and cracked over time, causing leaks.
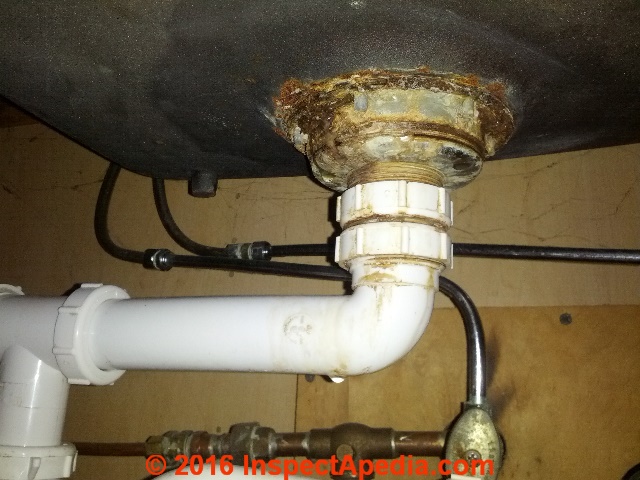
- Corroded or Damaged Drain Pipes: The drain pipes under the sink are susceptible to corrosion and damage, especially in older homes. Cracks or holes in the pipes can result in significant leaks.
- Clogged Drains: A clogged drain can cause water to back up and overflow, leading to leaks around the sink rim or drain connections.
- Faulty Faucet Cartridge: In single-handle faucets, the cartridge controls the water flow and temperature. A damaged or worn-out cartridge can cause leaks from the faucet spout.
- Damaged Sink Basin: Cracks in the sink basin itself, although less common, can also lead to leaks.
Tools and Materials You’ll Need
Before you begin, gather the necessary tools and materials. Having everything on hand will make the repair process smoother and more efficient. Here’s a checklist:
- Adjustable Wrench: For tightening and loosening nuts and bolts.
- Basin Wrench: Specifically designed for reaching hard-to-access nuts under the sink.
- Screwdrivers (Phillips and Flathead): For removing faucet handles and other components.
- Plumber’s Putty: Used to create a watertight seal around drains and faucets.
- Teflon Tape (Plumber’s Tape): Applied to threaded connections to prevent leaks.
- New Washers and O-Rings: To replace worn-out parts.
- Bucket or Container: To catch dripping water.
- Towels or Rags: For cleaning up spills and drying surfaces.
- Penetrating Oil (Optional): To loosen stubborn nuts and bolts.
- New Drain Pipes (If necessary): To replace corroded or damaged pipes.
Step-by-Step Guide to Fixing a Leaking Sink Kitchen
Now that you understand the common causes and have gathered the necessary tools, let’s proceed with the repair process. Follow these step-by-step instructions to fix a leaking sink kitchen:
Step One: Shut Off the Water Supply
The first and most important step is to shut off the water supply to the sink. Locate the shut-off valves under the sink, usually one for hot water and one for cold water. Turn both valves clockwise until they are completely closed. If you don’t have individual shut-off valves, you’ll need to turn off the main water supply to your house.
Step Two: Identify the Source of the Leak
Carefully inspect the sink and surrounding area to pinpoint the exact location of the leak. Use a flashlight if necessary. Check the faucet connections, drain pipes, washers, O-rings, and the sink basin itself. Look for drips, puddles, or signs of water damage.
Step Three: Tighten Loose Connections
If the leak is coming from a loose connection, use an adjustable wrench to gently tighten the nut or bolt. Be careful not to overtighten, as this could damage the fitting. If tightening the connection doesn’t stop the leak, proceed to the next step.
Step Four: Replace Worn-Out Washers and O-Rings
If the leak is caused by worn-out washers or O-rings, you’ll need to replace them. Turn off the water supply (if you haven’t already), and disassemble the faucet or drain assembly to access the faulty parts. Take the old washers or O-rings to a hardware store to find exact replacements. Apply a thin layer of plumber’s grease to the new parts before installing them.
Step Five: Repair or Replace Damaged Drain Pipes
If the drain pipes are corroded or damaged, you’ll need to repair or replace them. Minor cracks can sometimes be patched with plumber’s epoxy. However, if the damage is extensive, it’s best to replace the entire section of pipe. Measure the existing pipe and purchase a replacement of the same size and material. Use Teflon tape on threaded connections to ensure a watertight seal.
Step Six: Address a Clogged Drain
If the drain is clogged, try using a plunger to dislodge the blockage. If the plunger doesn’t work, you can try using a drain snake or chemical drain cleaner. Be cautious when using chemical drain cleaners, as they can be corrosive and damage your pipes. [See also: How to Unclog a Kitchen Sink Drain] Always follow the manufacturer’s instructions carefully.
Step Seven: Replace a Faulty Faucet Cartridge
If the leak is coming from the faucet spout and you have a single-handle faucet, the cartridge may be the culprit. Turn off the water supply and remove the faucet handle to access the cartridge. Remove the old cartridge and take it to a hardware store to find an exact replacement. Install the new cartridge and reassemble the faucet.
Step Eight: Seal Cracks in the Sink Basin
If the leak is coming from a crack in the sink basin, you can try to seal it with epoxy or a specialized sealant designed for sink repairs. Clean and dry the area around the crack thoroughly before applying the sealant. Follow the manufacturer’s instructions carefully.
Step Nine: Reassemble and Test for Leaks
Once you’ve completed the necessary repairs, reassemble the sink and turn the water supply back on slowly. Carefully inspect all connections and components for leaks. If you find any leaks, tighten the connections or re-apply sealant as needed.
Preventing Future Leaks
Prevention is always better than cure. Here are some tips to help prevent future leaks in your kitchen sink:
- Regularly Inspect Your Sink: Periodically check your sink and surrounding area for signs of leaks, such as drips, puddles, or water damage.
- Tighten Loose Connections: Regularly tighten any loose connections on the faucet and drain pipes.
- Replace Worn-Out Parts: Replace worn-out washers, O-rings, and cartridges promptly.
- Avoid Overloading the Drain: Be mindful of what you put down the drain. Avoid pouring grease, oil, or food scraps down the drain, as these can cause clogs.
- Use a Drain Strainer: Install a drain strainer to catch food particles and other debris before they enter the drain.
When to Call a Professional Plumber
While many sink leaks can be fixed with DIY methods, there are certain situations where it’s best to call a professional plumber. These include:
- Extensive Water Damage: If the leak has caused significant water damage to your cabinets, flooring, or walls, it’s best to consult a professional to assess the damage and make necessary repairs.
- Complex Plumbing Issues: If you’re dealing with complex plumbing issues, such as damaged pipes within the walls or floors, it’s best to leave the repair to a qualified plumber.
- Lack of Experience: If you’re not comfortable working with plumbing or you lack the necessary experience, it’s best to call a professional to avoid making the problem worse.
Fixing a leaking sink kitchen doesn’t have to be a daunting task. By understanding the common causes, gathering the necessary tools, and following these step-by-step instructions, you can often resolve the issue yourself. Remember to prioritize safety, take your time, and don’t hesitate to call a professional if you’re unsure about any aspect of the repair. With a little effort, you can fix a leaking sink kitchen and prevent further damage to your home.
By addressing the issue promptly, you can save money on water bills and prevent costly repairs down the line. Remember to always turn off the water supply before starting any repairs and to carefully inspect all connections for leaks after reassembling the sink. A leaking sink kitchen can be a nuisance, but with the right approach, it’s a problem that can be easily solved. If you are unsure about how to fix a leaking sink kitchen, consult a professional.
A leaking sink kitchen can stem from various issues, including worn-out seals, corroded pipes, or loose connections. Regularly maintaining your kitchen sink and addressing minor issues promptly can help prevent more significant problems in the future. Remember to check under the sink periodically for any signs of moisture or drips, and address them immediately to avoid further damage. Knowing how to fix a leaking sink kitchen empowers homeowners to take control of their home maintenance and prevent costly repairs.
