Mastering the Art of Skull Drawing: A Comprehensive Guide
The skull, a universal symbol of mortality and a recurring motif in art history, presents a compelling subject for artists of all levels. Whether you’re a beginner looking to hone your foundational skills or an experienced artist seeking a new challenge, mastering the art of skull drawing requires a blend of anatomical understanding, technical proficiency, and artistic interpretation. This comprehensive guide will walk you through the process, covering everything from basic anatomy to advanced shading techniques, helping you create realistic and expressive skull drawings.
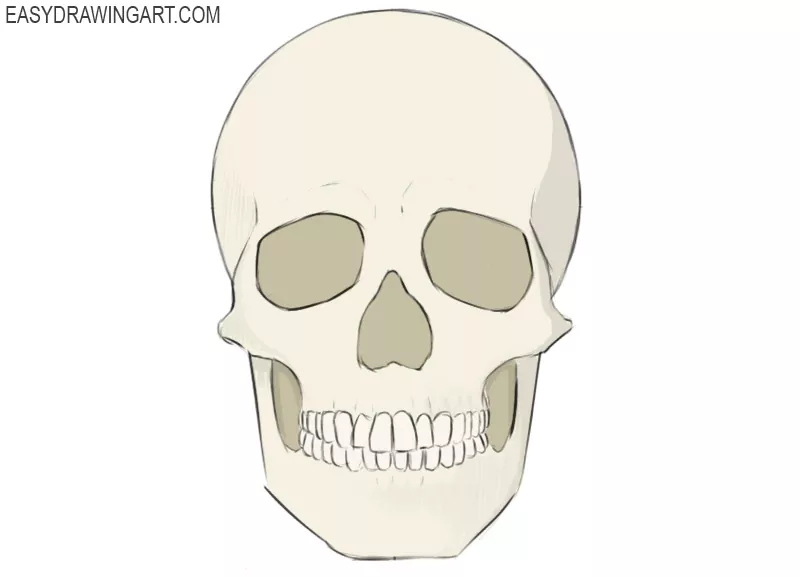
Understanding Skull Anatomy for Accurate Drawings
Before putting pencil to paper, it’s crucial to understand the basic anatomy of the human skull. While you don’t need to become a medical expert, a grasp of the key bones and their relationships will significantly improve the accuracy and realism of your skull drawings. The skull is composed of several bones fused together, but for artistic purposes, focusing on the main structures is sufficient.
- Cranium: The upper part of the skull that protects the brain. Pay attention to its overall shape – it’s not perfectly round but rather slightly elongated.
- Mandible (Jawbone): The only movable bone in the skull, crucial for depicting expression and anatomical accuracy.
- Maxilla (Upper Jaw): Forms the upper part of the mouth and supports the nose.
- Zygomatic Bone (Cheekbone): Contributes to the shape of the face and the eye socket.
- Nasal Bone: Forms the bridge of the nose.
- Eye Sockets (Orbits): The bony sockets that house the eyes. Their shape and depth are important for creating realistic skull drawings.
Studying anatomical diagrams and even handling a physical skull model (if available) can greatly enhance your understanding of these structures.
Essential Materials for Skull Drawing
The materials you use can significantly impact the outcome of your skull drawing. Here’s a list of essential supplies:
- Pencils: A range of graphite pencils (e.g., HB, 2B, 4B, 6B) allows for varying degrees of shading and detail.
- Eraser: A kneaded eraser is ideal for lifting graphite and creating subtle highlights. A hard eraser is useful for removing darker lines.
- Drawing Paper: Choose a smooth or slightly textured paper that can handle multiple layers of graphite.
- Blending Stumps or Tortillions: These tools help to smooth out shading and create tonal gradients.
- Ruler: Useful for establishing proportions and creating accurate guidelines.
- Reference Images: High-quality reference images of skulls are essential for accurate observation and detail.
Step-by-Step Guide to Drawing a Skull
Now, let’s break down the process of skull drawing into manageable steps:
- Establish the Basic Shape: Begin by sketching a light oval or egg shape to represent the cranium. Add a smaller, roughly rectangular shape below for the jawbone. These are just guidelines; don’t worry about perfection at this stage.
- Define the Proportions: Use a ruler or your eye to establish the proportions of the skull. The eye sockets are typically located about halfway down the cranium. The width of the skull is usually slightly less than its height.
- Sketch the Main Features: Lightly sketch in the eye sockets, nasal cavity, and jawline. Pay close attention to their shapes and positions relative to each other. Remember that the skull is not perfectly symmetrical, so don’t be afraid to introduce subtle variations.
- Add Detail: Refine the shapes of the bones, adding details such as the teeth, cheekbones, and sutures (the lines where the skull bones fuse together). Use your reference images to guide you.
- Shading and Value: Begin adding shading to create depth and form. Start with light, even tones and gradually build up darker areas. Pay attention to the direction of the light source and how it affects the shadows on the skull. Use blending stumps or tortillions to smooth out the shading and create tonal gradients.
- Highlights and Details: Use an eraser to lift graphite and create highlights. Add fine details such as cracks, textures, and subtle variations in tone.
- Final Touches: Review your skull drawing and make any necessary adjustments. Darken the lines where needed and refine the shading to achieve the desired level of realism.
Advanced Techniques for Skull Drawing
Once you’ve mastered the basics, you can explore more advanced techniques to elevate your skull drawings:
- Cross-Hatching: Use intersecting lines to create texture and shading. This technique is particularly effective for depicting the rough surface of bone.
- Stippling: Use small dots to create tone and texture. This technique is time-consuming but can produce stunning results.
- Contour Drawing: Focus on the outline of the skull and the contours of its forms. This technique emphasizes the shape and volume of the skull.
- Using Different Media: Experiment with different drawing media such as charcoal, ink, or colored pencils to create unique effects.
The Symbolism of Skulls in Art
Skulls have been a recurring motif in art throughout history, often symbolizing mortality, death, and the transience of life. The use of skull drawing extends beyond mere anatomical study; it delves into philosophical and emotional depths. In art, skulls can represent:
- Memento Mori: A reminder of the inevitability of death.
- Vanitas: An artistic genre that emphasizes the emptiness and futility of earthly pursuits.
- Rebellion: A symbol of defiance against authority or societal norms.
- Transformation: Representing change, decay, and rebirth.
Understanding the symbolism of skulls can add depth and meaning to your skull drawings, allowing you to create artwork that is both visually compelling and intellectually stimulating.
Common Mistakes to Avoid When Drawing Skulls
Even experienced artists can fall into common traps when drawing skulls. Here are some mistakes to watch out for:
- Incorrect Proportions: Getting the proportions wrong can make your skull drawing look distorted and unrealistic. Double-check your measurements and use reference images to guide you.
- Lack of Depth: Failing to create sufficient depth and volume can make your skull drawing look flat and lifeless. Use shading and highlights to create the illusion of three-dimensionality.
- Oversimplification: While it’s important to simplify the skull into basic shapes, avoid oversimplifying it to the point where it loses its unique character. Pay attention to the subtle details that make each skull unique.
- Ignoring Anatomy: Neglecting the basic anatomy of the skull can lead to inaccuracies in your drawing. Take the time to study the skull’s structure and how the bones fit together.
Resources for Further Learning
To further enhance your skull drawing skills, consider exploring these resources:
- Anatomy Books: Books on human anatomy for artists can provide detailed information about the structure of the skull.
- Online Tutorials: Numerous online tutorials offer step-by-step instructions and tips for drawing skulls.
- Art Classes: Taking an art class can provide personalized instruction and feedback from an experienced instructor.
- Museum Visits: Visiting museums with anatomical collections can provide valuable insights into the structure of the skull.
Practice is key to improving your skull drawing skills. The more you draw, the better you’ll become at understanding the skull’s anatomy and capturing its unique character. Don’t be afraid to experiment with different techniques and styles to find what works best for you. With dedication and perseverance, you can master the art of skull drawing and create stunning artwork that reflects your artistic vision. [See also: Drawing Realistic Portraits] [See also: Understanding Human Anatomy for Artists]
In conclusion, skull drawing isn’t just about replicating an image; it’s about understanding form, light, and shadow, and conveying a deeper meaning through your art. By mastering the techniques and understanding the symbolism, you can create powerful and evocative skull drawings that resonate with viewers. So, grab your pencils and start exploring the fascinating world of skull drawing!
