Stop the Drip: A Comprehensive Guide to Fixing a Leaky Sink
A leaky sink is more than just an annoyance; it’s a drain on your resources and a potential source of significant water damage. The constant dripping can lead to increased water bills, promote mold growth, and even damage the surrounding cabinetry. Addressing a leaky sink promptly can save you money and prevent costly repairs down the line. This comprehensive guide provides a step-by-step approach to diagnosing and fixing common causes of a leaky sink, empowering you to tackle this household problem with confidence.
Understanding the Anatomy of a Sink
Before diving into repairs, it’s crucial to understand the basic components of your sink. Typically, a sink consists of the following:
- Faucet: The fixture that controls the flow of water.
- Handles: Used to turn the water on and off, and to adjust the temperature.
- Spout: The part of the faucet from which the water flows.
- Aerator: A screen at the end of the spout that mixes air with the water, reducing splashing.
- Sink Basin: The bowl-shaped part of the sink that holds the water.
- Drain: The opening at the bottom of the sink that allows water to flow out.
- P-Trap: A U-shaped pipe under the sink that traps debris and prevents sewer gases from entering your home.
- Supply Lines: Flexible tubes that connect the faucet to the water supply pipes.
- Shut-off Valves: Valves located under the sink that allow you to turn off the water supply to the faucet.
Familiarizing yourself with these components will help you identify the source of the leaky sink.
Diagnosing the Source of the Leak
Pinpointing the origin of the leaky sink is the first step towards a successful repair. Here’s a systematic approach to diagnosis:
- Inspect the Faucet: Check around the base of the faucet, the handles, and the spout for any signs of water. A leak here could indicate worn-out O-rings, cartridges, or valve seats.
- Examine the Drain: Look under the sink and inspect the drainpipe, P-trap, and connections for any drips or signs of corrosion. A leaky sink drain often results from loose connections or damaged seals.
- Check the Supply Lines: Feel the supply lines for any dampness or leaks. Cracks or loose connections in the supply lines can cause a leaky sink situation.
- Observe While in Use: Turn on the faucet and observe where the water is leaking. This can help you narrow down the source of the problem. Is the leaky sink only apparent when the water is running?
Common Causes of a Leaky Sink and Their Solutions
Once you’ve identified the source of the leak, you can begin to address the problem. Here are some common causes of a leaky sink and their corresponding solutions:
Worn-Out O-Rings
O-rings are small, rubber gaskets that seal the connections between faucet components. Over time, these O-rings can become brittle and crack, leading to leaks around the faucet handle or spout. To fix this, you’ll need to:
- Turn off the water supply to the faucet.
- Disassemble the faucet handle and spout.
- Remove the old O-rings.
- Install new O-rings of the correct size.
- Reassemble the faucet.
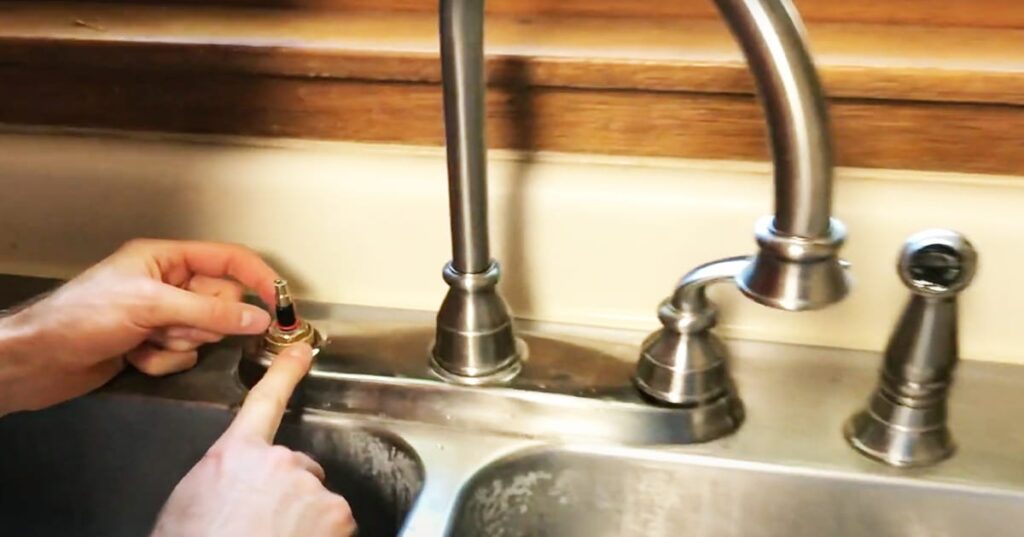
Loose Cartridges
Cartridge faucets use cartridges to control the flow of water. If the cartridge becomes loose, it can cause a leaky sink. To fix this:
- Turn off the water supply.
- Remove the faucet handle.
- Tighten or replace the cartridge.
- Reassemble the faucet.
Corroded Valve Seats
Valve seats are the part of the faucet that the valve presses against to shut off the water flow. Corrosion can damage the valve seat, preventing a tight seal and causing a leaky sink. Repairing this often requires specialized tools and might be best left to a professional.
Loose Connections
Loose connections in the drainpipe or supply lines are a common cause of leaks. To fix this:
- Tighten the connections with a wrench. Be careful not to overtighten, as this can damage the pipes.
- If the connections are corroded, you may need to replace them.
Damaged P-Trap
The P-trap can become damaged over time due to corrosion or physical impact. If the P-trap is cracked or leaking, you’ll need to replace it. [See also: How to Replace a P-Trap]
- Loosen the slip nuts on either side of the P-trap.
- Remove the old P-trap.
- Install the new P-trap, ensuring the connections are tight.
Worn-Out Washers
Compression faucets use washers to create a seal. These washers can wear out over time, leading to a leaky sink. To fix this:
- Turn off the water supply.
- Disassemble the faucet handle.
- Replace the worn-out washers.
- Reassemble the faucet.
Tools and Materials You’ll Need
Before you begin any repairs, gather the necessary tools and materials. This will help you work efficiently and avoid unnecessary trips to the hardware store. Here’s a list of essential items:
- Adjustable wrench
- Basin wrench (for hard-to-reach nuts)
- Screwdrivers (Phillips and flathead)
- Pliers
- Plumber’s tape
- Replacement O-rings, cartridges, washers, or other parts as needed
- Bucket
- Towels or rags
- Safety glasses
- Gloves
Step-by-Step Repair Guide
Here’s a general step-by-step guide to fixing a leaky sink. Remember to always turn off the water supply before starting any repairs.
- Turn off the Water Supply: Locate the shut-off valves under the sink and turn them clockwise to stop the water flow.
- Protect the Area: Place a bucket under the sink to catch any remaining water. Use towels or rags to protect the surrounding surfaces from spills.
- Disassemble the Faucet or Drain: Carefully disassemble the faucet or drain, depending on the location of the leak. Take pictures as you go to help you remember how to reassemble everything.
- Identify and Replace the Damaged Parts: Examine the components for wear and tear. Replace any damaged O-rings, cartridges, washers, or pipes.
- Reassemble the Faucet or Drain: Carefully reassemble the faucet or drain, making sure all connections are tight.
- Turn on the Water Supply: Slowly turn on the water supply and check for leaks. If you still see leaks, tighten the connections further or re-examine the components.
Preventing Future Leaks
Prevention is always better than cure. Here are some tips to prevent future leaky sink problems:
- Regularly Inspect Your Sink: Check for any signs of leaks or corrosion.
- Tighten Loose Connections: Periodically tighten the connections in the drainpipe and supply lines.
- Replace Worn-Out Parts: Replace worn-out O-rings, cartridges, and washers before they cause leaks.
- Avoid Harsh Chemicals: Avoid using harsh chemicals in the sink, as they can damage the pipes and seals.
- Don’t Overload the Drain: Avoid pouring grease or large amounts of food scraps down the drain.
When to Call a Professional
While many leaky sink repairs can be handled DIY, some situations require the expertise of a professional plumber. Consider calling a plumber if:
- You’re not comfortable working with plumbing.
- You can’t identify the source of the leak.
- The leak is severe or causing water damage.
- You’re dealing with corroded pipes or complex plumbing systems.
A leaky sink is a common household problem that can be easily fixed with the right knowledge and tools. By following the steps outlined in this guide, you can diagnose the source of the leak, make the necessary repairs, and prevent future leaks from occurring. Remember to always prioritize safety and consult a professional if you’re unsure about any aspect of the repair. Taking care of a leaky sink not only saves you money but also protects your home from potential water damage. Don’t let that drip become a flood!
